Categories
Flooring

Is Concrete Flooring Right For You?

Is Concrete Flooring Right For You?

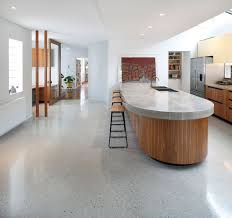
Plain concrete slabs have served as the floor covering product for basements, garages, outdoor patios, and also utility locations for several years, but concrete is now also a viable material in residence insides, where it can be polished, engraved, or stained to function as the completed floor covering surface. If you are utilized to thinking of concrete as an utilitarian surface area suitable only for practical surfaces, the many merits of concrete as an attractive floor covering product might come as a surprise. Concrete can make several of one of the most elegant and vibrant floors you have ever seen, though they aren’t a great stylistic fit for every residence.

A concrete flooring is very solid as well as resilient, and also if it is effectively installed and kept, it can last for as long as you own your house. And the layout alternatives are incredibly varied. But concrete is additionally very tough and chilly underfoot, and also it is a practical selection only where there is an existing concrete slab, such as in residences with slab-on-grade foundations, or in the cellars of homes built over basement structures. Because these floors on “on-grade”– straight speaking to the soil– they can be at risk to wetness moving up from the ground right into the living space.

Concrete Floor Pros and Cons

Concrete Flooring Price

The installed price for a concrete floor can vary rather a great deal since there are so many coating options. Costs can vary from $2 per square foot for a fundamental to $30 or even more for high-end attractively made floors.

Fundamental style: $2 to $6 per square foot. A basic concrete floor layout consists of pouring the piece or overlay, then a fundamental polishing and also single colorizing treatment (staining or dyeing).
MId-range style: $7 to $14 per square foot. This price variety includes putting the piece or overlay, then polishing as well as discoloring with multiple shades.
Premium design: $15 to $30 per square foot. One of the most advanced (and expensive) concrete floors can include producing geometric patterns in the piece or overlay, as well as multiple shades and a selection of texturizing or marking strategies. These are fairly imaginative floorings.

A sealed and also appropriately maintained concrete floor can last forever. Also in commercial applications, concrete can survive under high-traffic conditions for several years. Over the long term, this can save you a considerable amount of cash as well as effort over replacing flooring every couple of years.

Repair and maintenance

Concrete floor covering starts with a structural concrete pad that is by nature exceptionally strong as well as durable, which is why it is so preferred for hard-working commercial areas, such as garages and also stockrooms. Concrete has comparable virtues when used as a household flooring product. It is challenging to damages, and also high heels, furnishings legs, and also animal claws will not scratch the surface. You additionally do not have to bother with damages from the majority of went down products. While it is feasible to chip or scratch a concrete surface area, you need to function quite hard to do so.

Maintaining a concrete floor looking its ideal is rather simple. It needs to be secured or waxed every three to 9 months, depending on the degree of web traffic, in order to preserve the protective layer. Besides that, you can utilize a neutral cleaning agent to mop the flooring clean periodically. A blue energy pad can be made use of for particularly persistent discolorations.

Concrete floors can be prone to settling and cracking gradually, as well as this is an extra constant trouble when an existing structural piece has actually adapted to a finished household flooring surface– such as when a basement or loft space apartment has actually been converted to living room. If the flooring becomes badly cracked, it is possible to patch, work, as well as refinish the flooring to recover its shine.

Layout

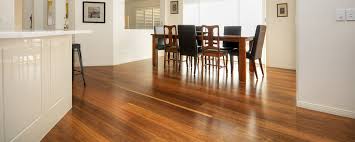
Visually, concrete floors are a good match for houses with a modern-day or commercial design and also are less appropriate for timeless vintage house designs. A refined and also acid-stained concrete floor will likely watch out of place in a classic colonial-style residence, for example, but fit quite nicely right into a contemporary-style home.

The moment when a concrete floor implied simply a poured as well as polished piece is long because gone. While the basic polished piece is occasionally exactly what is needed, property owners likewise have the option of a selection of texturizing and colorizing strategies:

Overlay: This refers to a thin layer of new concrete laid over an existing piece to renew it. The overlay is after that brightened and also colorized similarly as a new slab.
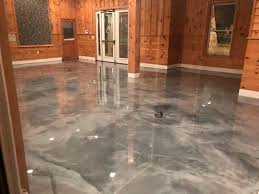
Polish: A basic put piece or overlay can be sharpened with gradually finer rough pads to create a glass-smooth finish. When a sealer is after that used, the outcome is a really attractive, shiny floor.
Acid-stained: When treated with mild acids, concrete will engage to create a vivid multicolor surface area that has a marble-like look. Each floor is totally unique.
Dyed: Another approach of colorizing concrete, dyeing is the application of a solid colorizing agent over the ended up surface. Unlike acid-staining, coloring creates a strong color result.
Texturized or marked: While still damp, the concrete surface can be combed, marked, or installed with glass grains or fine aggregate to give it a three-dimensional appearance.
Geometric departments: High-end concrete floorings are occasionally set out with geometric patterns, with each section colored or texturized differently for artistic impact.
Stenciled or airbrushed: Concrete floors can act as big canvases for a variety of artistic painting strategies.

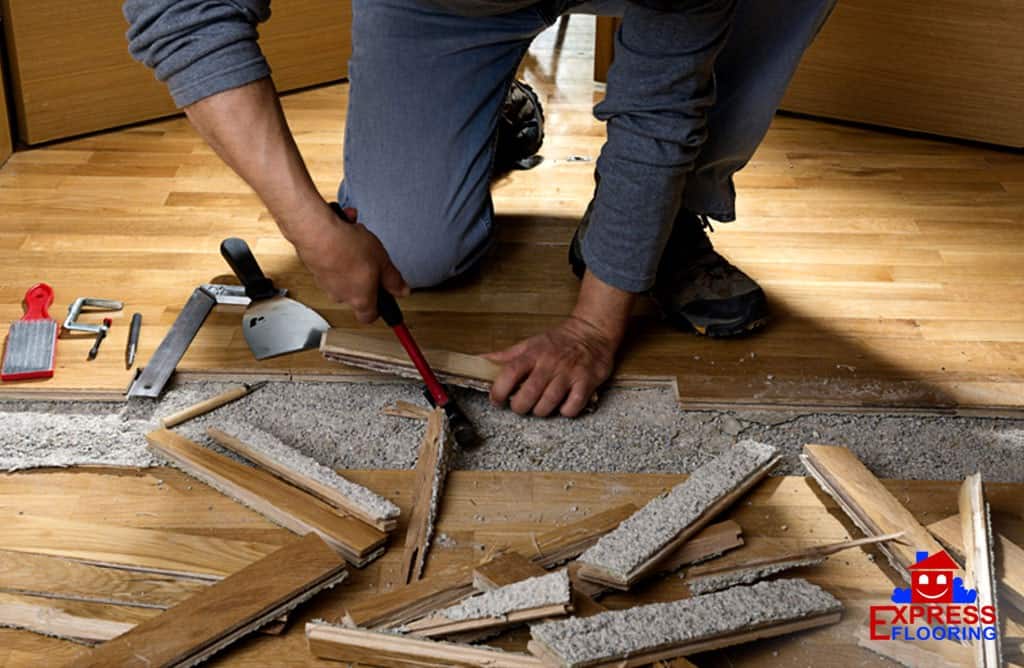
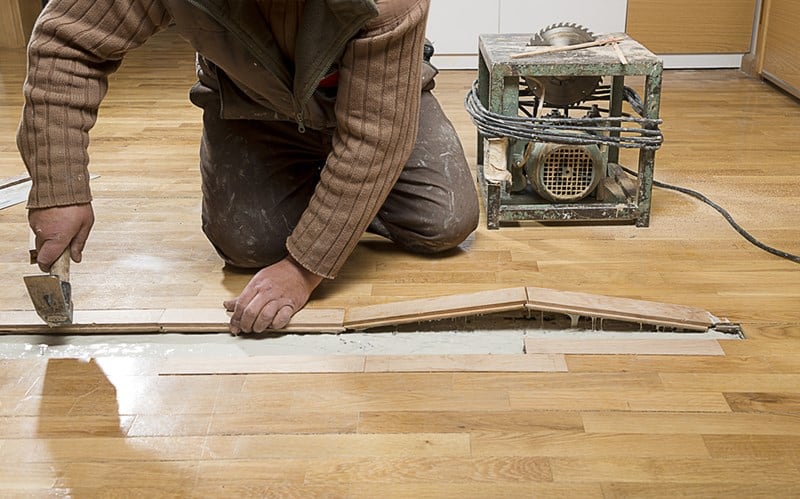
Concrete Floor Installment

In the majority of situations, a residential concrete flooring is developed by grinding an existing architectural concrete piece and also using a selected polishing, colorizing, or texturizing strategy. This can include first removing any kind of existing floor covering, such as carpets or plastic, to expose the existing concrete piece. Where the piece remains in inadequate condition, a thin overlay of fresh concrete can be poured over the old slab; this overlay after that becomes the base surface for polishing, colorizing, or texturing. Where a fresh slab or overlay is being put, colorizing representatives can be mixed right into the concrete prior to it is poured. Or else, the staining or coloring generally takes place after the concrete has actually been polished by grinding with abrasive pads with considerably better grits.

The last step is to use a concrete sealer to secure the surface. This treatment will certainly require to be duplicated at regular intervals; some professionals encourage an annual reapplication.

While it is somewhat uncommon, it’s additionally feasible to install concrete floor covering over a wood-framed subfloor. Right here, the process includes putting a thin layer of overlay concrete over a thoroughly prepared subfloor, then using the chosen colorizing and also polishing strategies. Nonetheless, even a really slim concrete overlay is quite hefty, as well as the procedure typically requires architectural support of the timber framework.

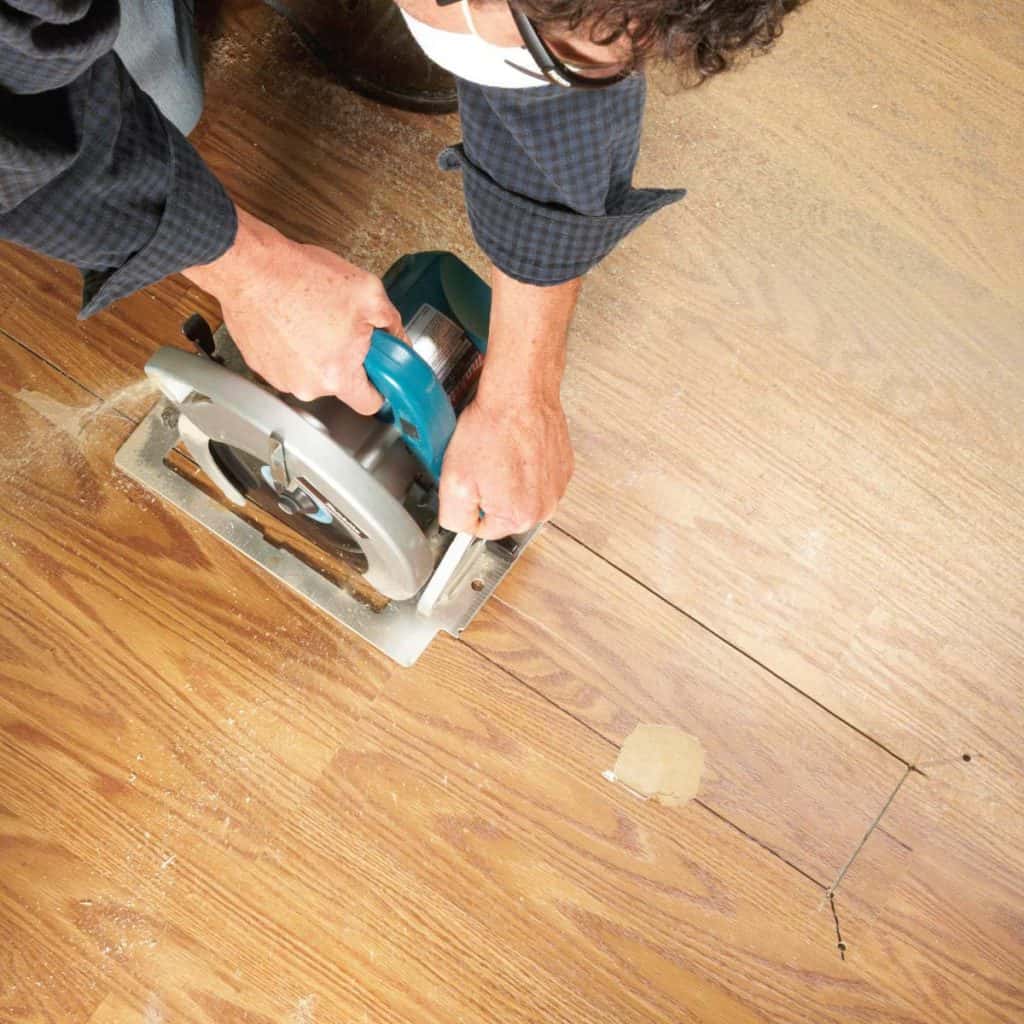
Whether it involves putting a fresh new piece, adjusting an existing slab, or putting an overlay, concrete floorings are normally mounted and also completed by specialists, considering that the job is fairly difficult as well as requires special devices. Daring DIYers can rent mills to develop a concrete slab themselves, though this is not advised.

As long as the concrete is smooth and also free from holes, bumps, as well as problems, you have the choice of covering it over with any kind of flooring surface covering you pick at a later day. Concrete floorings permit you a lot of future layout liberty.

Disadvantages

The stamina as well as resilience of this material can likewise be an obligation. The surface of a concrete floor is very tough– falling onto concrete will certainly harm and might seriously injure people. Items dropped on these surface areas are likewise most likely to shatter or fracture. That is why concrete floors are not suggested for locations that will be made use of by youngsters or senior individuals, or in kitchens where dropping dishes are most likely. The solidity of concrete additionally makes it uncomfortable to stand on for extended periods.

When concrete is highly polished or buffed, or when covered with a gloss sealant, the surface area can be extremely slippery, especially when wet. Concrete in shower rooms, cooking areas, or entrances is specifically prone to this. An additional downside of concrete is that it has little protecting value, and it will feel fairly cold on winter season mornings– unless it has been mounted in conjunction with a radiant floor heating unit. The intrinsic temperature of concrete can be countered somewhat through the use of carpets and throw rugs.

If not effectively sealed on both leading as well as lower surface areas, concrete is quickly permeated by wetness when mounted over bare soil. The awesome temperature of concrete can likewise trigger moisture to condense in damp problems. If fluid does take care of to make its way right into the pores of a concrete floor, it can result in the growth of mold and mildew or mold in your home. In some atmospheres, you will certainly likewise need to worry about the moisture cold, expanding, and cracking the flooring.

Ecologically aware customers can feel excellent about completing an existing concrete piece, because this needs no manufacture of fresh concrete. However those same homeowners have reason to be worried regarding putting a new slab or overlay, since the manufacture of concrete requires a substantial expenditure of power and also generous quantities of co2.

Is a Concrete Floor Right for You?

A concrete flooring can be a great choice if you have an existing slab structure and also a home style that is a good stylistic suitable for the sleek gleam of developed concrete. Many people appreciate the low cost of concrete floor, especially when considering the long life this flooring will enjoy– you may never ever need another floor covering. But be gotten ready for a floor that is extremely difficult and also naturally cool.

Categories
Flooring

How To Repair Damage In Your Hardwood Floor?

Hardwood floors are associated with old homes. It’s almost difficult to find an old house without them. And yet, they are vanishing since individuals do not understand how resilient and long-lasting they are. Unknowing property owners and specialists remove or conceal these remarkable floorings when they could be conserved and utilized for another 100+ years!

Other than refinishing wood floorings, the most typical repair work we encounter is board replacement. It may seem intimidating to get rid of a tongue and groove floor board without harming the neighboring boards, however with a couple tricks of the trade I’ll teach you to get it done yourself if you are a brave DIY warrior.

And do not miss my little secret to a perfect match at the end!

Step # 1 Remove the Damaged Boards

Whether it’s termites or animal discolorations, some boards will undoubtedly be beyond conserving. When you find these boards, you’ll need to eliminate them entirely and discover an appropriate replacement (more on this later). It’s also essential to take the entire board, or a minimum of stagger the joints like in the picture below. This will permit the spot to blend in flawlessly with the existing floor. You’ll require a few tools to get the job done too:

1.

  1. Circular Saw
  2. Hammer.
  3. Cat’s Paw/Trim Pry Bar.
  4. Wood Chisel.

5.Multi-Tool (recommended).

  1. Brad Nailer.

– Mark the Boards  I mark the specific boards I will be getting rid of really clearly along their entire length so there are no mistakes.

– Determine Thickness  You require to find out how thick they are (* this is necessary *). You require to know how thick the boards are so you can set the depth of the cut on your circular saw appropriately. The majority of old wood floorings are between 1/2 ″ and 1 ″. The very best location to find the depth is to get rid of a flooring heat register or bring up a limit. The limit is less fun.

– Set Saw Depth  Once you know the thickness of your flooring, set your circular saw to just a hair much deeper than the thickness of the flooring (about 1/32 ″).

– Cut 2 Lines– Make 2 parallel plunge cuts into the floor board along its length with the circular saw. Start and finish as close as you can to the ends without crossing into the next board. You’ll basically be cutting the board into 3 slimmer boards. One piece will have the tongue, one piece the groove, and the middle piece will be free drifting.

– Finish Cut With Multi-Tool– To end up the cut, you require a multi-tool or chisel. Cut the percentage of wood remaining to the end of the board so that all 3 pieces of the board are completely independent of each other.

– Remove the Pieces– The middle piece needs to come out easily with a pry bar or perhaps your fingers. The groove side will likely need a bit more coaxing with your pry bar. The tongue side will have been pin down and so you’ll require to utilize the feline’s paw to either dig out the nails or simply tear the staying piece out. This side usually breaks a few times on its way out.

– Clean Up– Vacuum out all the saw dust and ensure the tongue and groove of the remaining boards are clear of any remaining wood and in good shape.

Action # 2 Install the Replacement Boards.

So, now that it’s all tidied up and free of any broken boards, you need to patch the flooring with your replacement boards. If your replacement boards are not the EXACT exact same width and density as the originals, the repair will not operate at all. Do not think something close will suffice. Here is the way to get the boards into place effectively.

– Measure & Cut to Length– Measure the length you require to change and cut your replacement to size. It will require to be tight so if anything, do not cut it short. Cut it long and slip up on it if you must.


To change simply a few boards:.

– Remove the Groove– You’ll need to eliminate the bottom half of the groove on your replacement board. I usually use a table saw to cut it off easily, but a wood sculpt or hand plane will work fine. It doesn’t need to be pretty, simply don’t harm the top of the board. This is only to be done if you are changing simply a few boards. For bigger sections see the instructions in the following section.

– Insert Tongue Side First– Insert the replacement piece tongue side initially into the existing flooring. It will need some force to get it into place, but do not be too aggressive. Sometime a piece of scrap lumber can be utilized as a beater board so you can carefully hammer the piece in place with scarring the surface.

– Face Nail in Place– Once the board is seated effectively and flush with the existing floor, you can nail it in place. I put two 1 1/2 ″ brads on each end and after that every 16-24 ″ alternating sides. Keep in mind that given that we got rid of the bottom half of the groove, the only thing holding that side down in the nail. So you might need a couple more nails on the groove side if the board isn’t completely snugged down at first.

To change a large section:.

– Insert Groove Side First– If you’re doing a large section, you ought to install the groove side initially. There is no need to remove the groove. Simply fit the replacement’s groove into the existing board’s tongue. Use a beater board and hammer to make sure it is fully seated and snug.

– Blind Nail– With this strategy you can now blind nail the board in place by nailing through the tongue into the subfloor or flooring joist. Do this every 16 ″ or every where you have a joist if there is no subfloor.

– The Last Board– In order the set the final board, you will have to follow the directions above about removing the groove. and advance from there.


Step # 3 Refinish the Repair.

Once the boards remain in place, the only method to have a seamless match is to refinish the whole floor. This will take care of any high or low areas and will likewise guarantee a constant surface throughout.

If you changed just a couple boards, you may be able to complete them prior to setting up, but they will still look slightly different. If a full refinishing is beyond your reach or price range right now then just relax. The replacement boards will be fine up until the time to refinish deal with your spending plan. Till then, you’ll simply need to take pleasure in the truth that you do not have crumbling or severely stained boards any longer!

Categories
Flooring

How To Manage and Keep Up Your Epoxy Floor

How To Manage and Keep Up Your Epoxy Floor

Consider these tips to tidy and also preserve epoxy floor covering.

I have actually had my garage coated with epoxy for more than 9 years. Given the appearance, I obtain asked about just how much time and energy I took into my garage finishing’s upkeep. The solution is, not that a lot, actually.

I wipe the epoxy floor covering two or 3 times each year. Periodically, I vacuum up debris with the shop vac, however every little thing else is just place cleaning. It’s very little work to have a flooring that is visually appealing and also welcomes guests. Contrast that to most various other garages that have stains, concrete wear, dusting and various other issues. You get the picture. The top epoxy flooring company near you should be able to help if need be.

Whether you have professional epoxy coverings for your garage, cellar, porch, sunroom or pole barn, the maintenance as well as usage tips are usually the very same. A couple products below may just relate to harder usage applications:

Keep Your Epoxy Floor Looking Brand New

1. For small spills or vehicle drippings, merely wipe them up with a paper towel or other soft towel.

2. Routine maintenance cleaning is best accomplished with either a soft bristle mop or a blue industrial dirt mop (readily available at any home improvement store).

3. For hefty cleaning of a soiled epoxy flooring, sweep away any type of loose particles and then mop flooring with a hard foam wipe, warm water as well as clear ammonia. Four to five ounces of ammonia per gallon of water is all that is needed to appropriately remove soiling.

Some winter road “pre-treatment” compounds leave a hazy movie on epoxy flooring coverings after cleansing. Continual rinsing might be called for to keep the compounds from drying out onto brand-new locations of the floor.

5. Some discolorations (including rust) may need light rubbing with a cooking area scrubbing pad. If you’re incapable to remove with just hot water, we recommend using Soft Scrub. Do not use Comet or other unpleasant cleansing chemicals on the coatings.

6. If desired, the epoxy flooring can be hosed out and also squeegeed completely dry.

7. Do not use any kind of cleaner that contains acids (citrus cleaners or vinegar) or soap-based cleansers. Soap based cleaners leave a deposit on epoxy floor covering that not just diminishes the luster, yet additionally end up being progressively unsafe must the floor splash.

8. Make use of a walk-off mat (welcome mat) inside any access door to assist elimination of snow and also water from the bottoms of shoes when going into the garage. Longer mats might be called for throughout wintertime climate.

9. Place a computer system mouse pad under a bike kickstand to avoid damages to the layers surface.

10. Make sure all areas are tidy before lifting hefty loads with rolling jacks.

11. Place pieces of half-inch plywood under jack stands when birthing heavy loads.

12. Make use of a welding floor covering when welding over epoxy layers.

I need to emphasize that if you often wipe your floors, like many of our customers do, you may develop a soapy residue that dulls the appearance of the flooring finishes. This can typically be stripped off by following the 3rd tip over.

We obtain a number of phone calls each year from our display room customers where they mention the layers dulled. To date, every instance has been absolutely nothing greater than deposit build-up from the cleansing method they were utilizing.

While specialist epoxy coatings are really durable, they are not indestructible. If damages does happen, get in touch with the setup business to obtain aid with just how to fix any kind of suspected damages.

Categories
Flooring

Choices for your new floors

Wood vs. Laminate

Wood and laminate happen to be the two of the most popular types of flooring among builders and homeowners. Sometimes the difference between the two can be rather hard to spot. While wood flooring is so named because it is actual wood, laminate is actually a type of technology that makes floors look like real wood. Based on their manner of manufacture, there are advantages and disadvantages of going with either one.

Price and Aesthetics:

The look and feel of wood on the floor reminds people of the natural wonders that comprise the forest. Moreover, there is a variety of floors to choose from, since wood comprises a wide range of species. It is a look and feel that laminate flooring—comprising multiple wood layers of material covered by a plastic film that has an image of hardwood—cannot quite replicate. In fact, in some cases—where the material is really cheap and has artificial looking wood grain textures—the lamination looks ugly. Even though laminate is not as “natural” as wood, it is considerably less expensive. Since wood flooring is made of actual wood, it tends to be twice as expensive as laminate.

Durability:

Over time, floors show wear and tear due to the traffic load from people walking on them. Laminate flooring has the advantage here, since it consists of compressed wood. The pressed layers make it less susceptible to moisture, scratching, and wear and tear. On the other hand, wood flooring is not as resistant to heavy traffic; the more feet it receives, the quicker it deteriorates. Also, wood can easily get scratched, and it is not a good absorber of moisture.

Maintenance and Repair:

To keep it in the best shape possible over time, floors need to be cleaned regularly. Laminate flooring is comparatively easy to clean; all that is needed are basic cleaning tools: brooms, mops, wipes, and cloths. Wood flooring, on the other hand, requires a little more delicate care. Homeowners must buy cleaning agents that are specifically manufactured for hardwood cleaning. Using just any cleaning product—such as detergent, universal cleaners or furniture polish—can damage, scratch or dull the floor, thus shortening its lifespan. However, when it comes to repairs, wood flooring can be restored with sanding and refinishing out perfections. In fact, wood flooring is known to last for up to 80 years without repair or replacement. Laminate floors do not repair as easily, since it consists of different layers kept together; the lifespan is generally half of that of wood flooring.

http://freshome.com/2010/11/01/the-pros-and-cons-of-hardwood-vs-laminate-wood-flooring/

Deciding Between Hardwood and Laminate Flooring: Which Is Better?

Categories
Flooring

Subfloor/Concrete preparation…. why is it so important

Installing hardwood flooring in your home has a lot of advantages. Not only is it durable and easy to clean, but it has a classy, almost rustic look that carpeted surfaces seem to lack. A lot of people might say that installing hardwood floor is an easy task as well. In some ways, they’re right. The process of installing a hardwood floor or any kind of tiled flooring usually involves laying boards or tiles on top of a subfloor. A subfloor is usually plywood or concrete, and it makes for a good solid foundation for your new hardwood or tiled floor. It does need to be prepared however, a task that some homeowners don’t realize is very important.

Why Preparing Your Subfloor is Important

As durable and versatile as a concrete subfloor can be, it can cause a lot of problems if it is damaged or is otherwise unprepared for hardwood flooring. Cracks, spilled paint and even dust and debris can all mar your new flooring and give it an uneven appearance. Any kind of damage will also become worse over time, and it will be a lot harder to fix it if you’ve already layered what is supposed to be a beautiful hardwood floor on top of it. A hardwood floor can increase the value of your home, but unsightly cracks or bulges will only have the opposite effect.

Tips for Preparing Your Subfloor

Preparing your subfloor should be a major part of any remodeling project that has to do with new flooring. Fortunately, it shouldn’t be as difficult as you might think. Most of your prep time will be spent cleaning the concrete and keeping it free of any dirt and debris. This can be done with a simple broom and dustpan, but you may want to use a vacuum capable of cleaning dust from a hard surface to make sure you catch everything. Any cracks you see will have to be filled in and leveled out. In fact, you should check to make sure that your subfloor is completely level before you proceed with putting down any kind of flooring. Any surfaces that aren’t level may call for more extensive remodeling than a new floor. You should have no more than 3/16 of an inch in height variation before you proceed.

Finally, if you aren’t completely sure your subfloor is worthy of a new layer of hardwood, contact a professional contractor to take a look at it. A flooring contractor will have the necessary tools and expertise to determine if a new hardwood floor is right for your home.

What If My Floor Is Damaged From Water

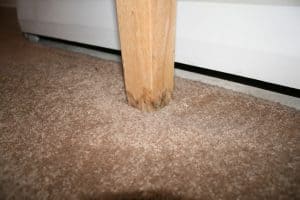
Water damage can happen to your home for a number of reasons. A cracked foundation can mean a flooded basement, and holes in the roof can mean water damage from the top to the bottom. A washing machine that has bounced around too much over time might bump its exhaust hose out of the slot, and dishwashers, sinks, toilets, and showers can spill over sending water everywhere. Nature is no friend either, given that rainstorms and flooding creeks can saturate the ground around a home and even get into a home.

All of these situations might put you in a place where you either using a water damage service company or about to. Getting someone in there quickly is essential to contain the situation and prevent mildew and mold from threatening the very structural integrity of your home. If this is the situation you are facing, then keep reading to learn 7 things you need to do:

1) Call your homeowner’s insurance provider: Depending on the cause of the water damage, your policy may or may not kick in. If it does, your process and life are going to be much simpler, given that you are probably going to be assigned a particular water damage service company rather than having to choose one. Also, they’ll pay for most if not all of the work done.

2) Possibly call your flood insurance provider: Many homeowner’s insurance policies won’t cover flooding issues if it was in fact a natural flood that impacts the entire property. You would need supplemental flood insurance for this, if it’s even available for your property.

3) Find out if you need to stay somewhere else: Sometimes, a home suffers so much damage that you and your family might have to stay in an entirely different residence while the home is being fixed up. In these cases, insurance coverage usually provides for temporary housing in an extended-stay facility.

4) Get an estimate of how long things will take: Knowing when your home will be fully yours again will determine everything from your budget and expenses to your social calendar. No estimate is ever a guarantee, but you should have some idea when ‘normal’ will return.

5) Figure out if some possessions might just be lost: Water damage sometimes ruins furniture and other possessions to the point of not being salvageable. Extraordinary efforts might be made for family heirlooms and anything priceless, but routine items might just get replaced.

6) Learn when to stay out of the way: If there’s danger present, or hazardous work, or even moist carpets that shouldn’t be worked on, it might be easier to just not be around.

7) See what you can do to help: Even if you can’t chip in specialized labor, showing up to bring tea and snacks to the work crew can brighten their day and get you on their good side.

Having a professional crew like 411waterdamage.com come in to try and salvage or restore your home is stressful enough, but it’s not as stressful as the initial water damage or the consequences you’d face if you didn’t call them in. If you are using a water damage service company in your home, use the 7 things you’ve learned here to expedite the process or at least minimize the stress of it.